Each year I start to notice the stats pickup on one of our older posts about our trade show booth and it prompts me to think back about how we pulled off the trade-show booth design. It was honestly very easy, and was all done for under $350 excluding furniture and decor. We wanted to make sure that it could fit inside a longer van, and was easy to put up and take down. Hopefully you can learn from what mistakes I made and figure out easier ways of doing some of the things I did.
The Floor
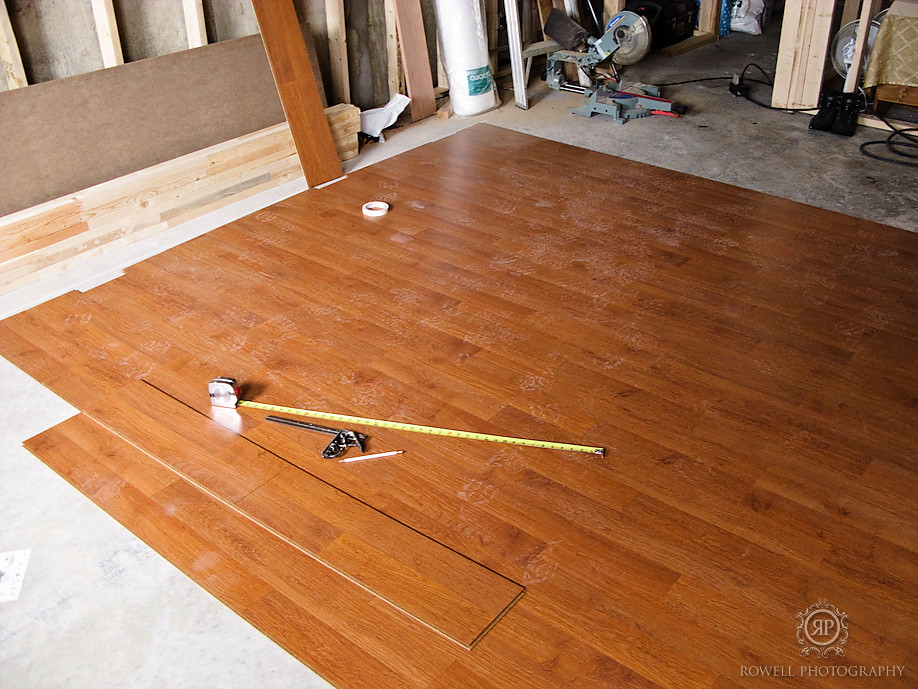
The question comes up a lot in email and conversation on how or what I had used for the floor of the booth, and where did I get it. At the time I wanted something that was small and simple to transport, not to mention I wanted something as cheap as possible. Laminate flooring or floating flooring is exactly that cheap. Knowing that I needed enough for a 10’x10′ booth, and that worked out to 100 square feet (gotta love my math skills haha) all I had to do was find the cheapest per square foot I could, and hopefully the nicest colour too. I don’t remember what the price was exactly but would guess it was about $1.30/sq. foot.
The key to the flooring was laying it out ahead of time. So I taped off a 10’x10′ section of the floor in a room and then started to assemble it and cut the excess, until it was all finished. Once I had the taped square all filled with flooring I started to disassemble it piece by piece and label each wood plank with a number until it was all packed up. The key to this was marking one corner as the back left or where you wanted to start and then marking each piece of flooring with successive numbers to make putting it back together easier.
When the booth was being set up we used an under matting for the floating floor. You have to do this or when you walk on the floor it will crackle when dirt gets under it. Because we were in a warehouse (convention center) for the show it was nice to not have to stand directly on the concrete all day. It was also nice not to have snap crackle and pop there with us too when talking to each passer by.
Making sure that there were no trip hazards we also purchased flooring edges to go around the open ends of the floor that were exposed to traffic. These were applied with duct tape to the bottom of the finished floor by putting the tape half under the floor and the other half under the edging. You can see in the video where we seem to float along the edges of the flooring for no reason, it was actually making the tape stick. Here is the link to the video.
The Walls
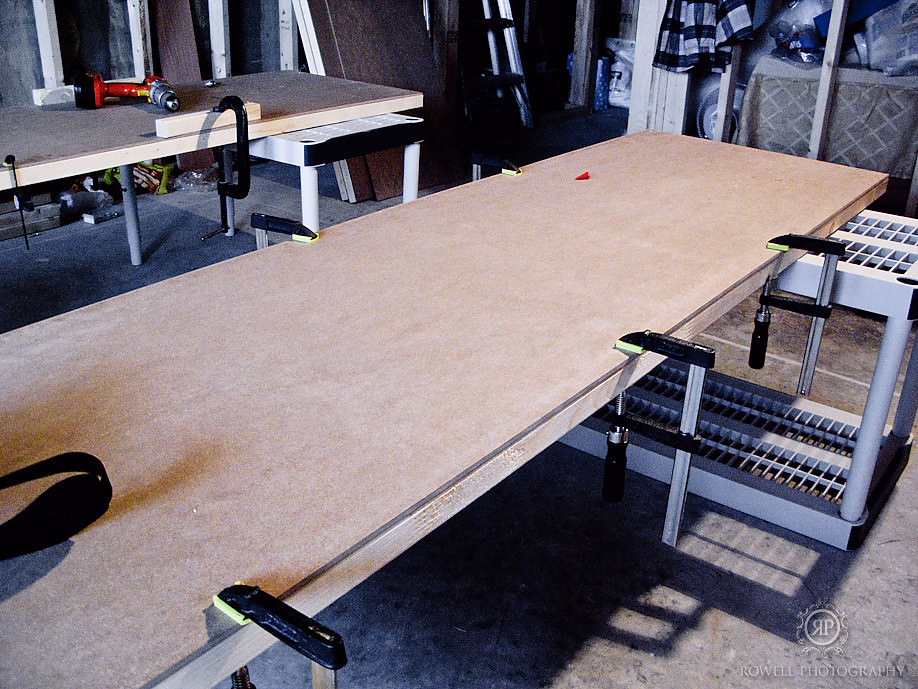
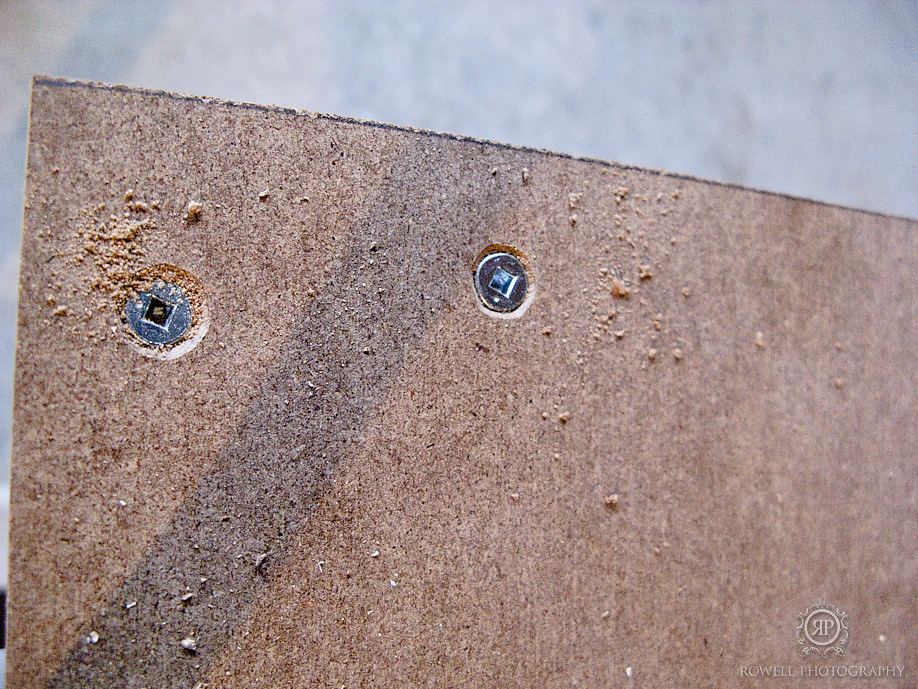
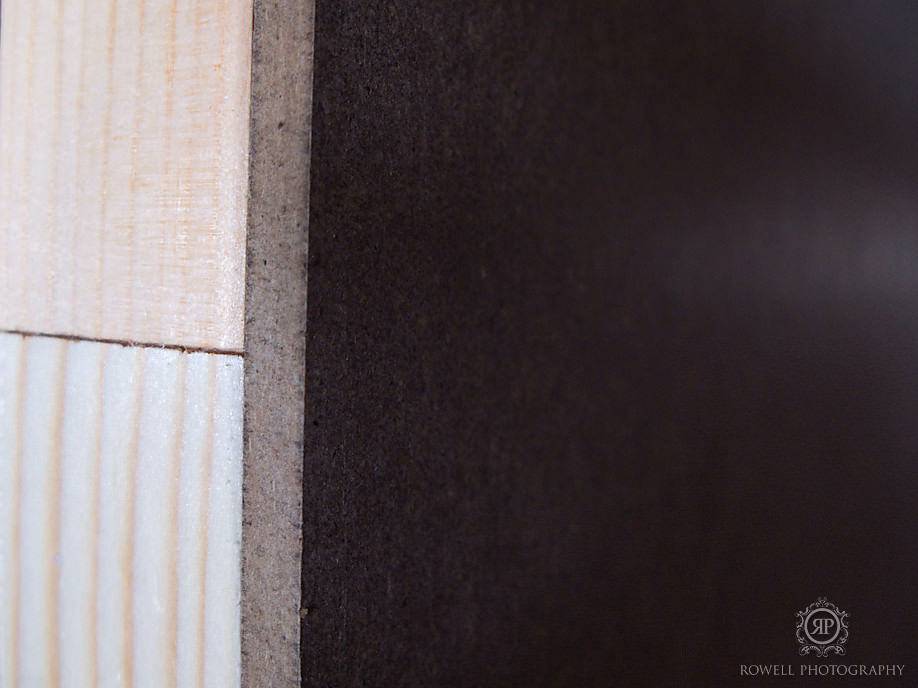
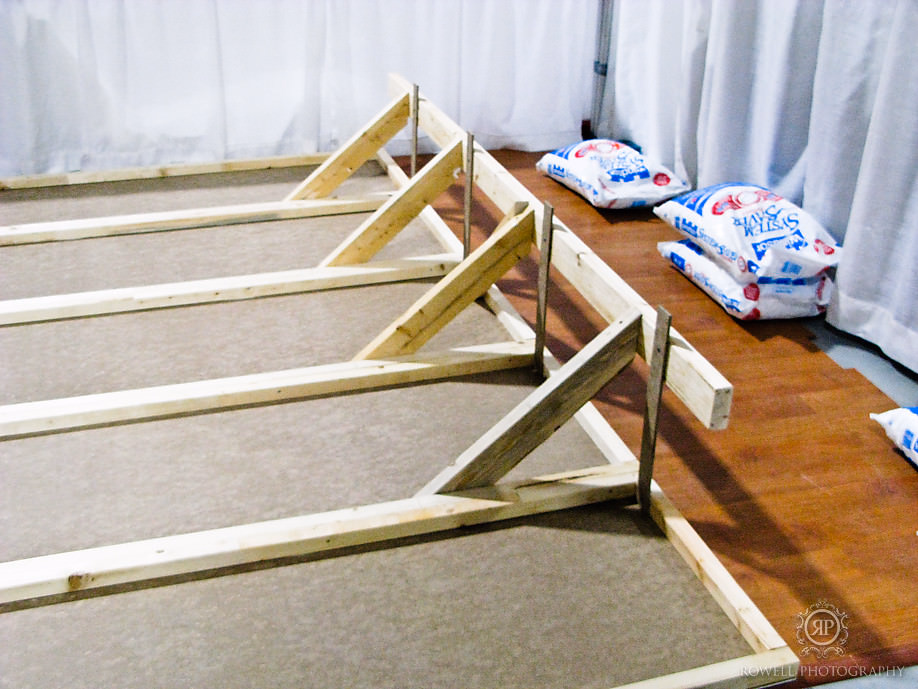
The walls were made from 2″x2″ pine, and 1/4″ MDF boards. I had the MDF cut into the desired sizes of 2’x8′, giving us 5 sections of 2’x8′ and one more section left over that was a little taller but still 8′ long to make the wall behind the sofa. Each of the 2’x8′ sections were laid out with the pine on the back to create a frame along the inside edge of the panel. I also made sure that the edges were flush against the pine and MDF so that when they were assembled they would not show a gap between them. I had to pre-drill each of the MDF boards to secure them to the pine and countersink the holes too make the screws disappear when I put some wood puddy in the holes. My father also suggested we use liquid nails between the pine and MDF to add more stability. Painting was done after the boards were all assembled and the holes were filled in. I skimped on the paint so I didn’t have to buy more than what was needed and only pained the visible parts of the walls, where the rest was blank to be covered over by chair rail.
I was worried that there wouldn’t be enough stability for the wall and that it would fall over, but I didn’t worry for too long, I have worked on TV/Movie sets before and have seen dozens of walls built and changed and built again and all of them with just simple supports. So I decided to create a triangular support for the back of my wall, and to prevent it from falling forward or backward I would use some sand bags on the support (I actually used bags of water softener salt because they were cheap and could be used again).
The original plan for putting the wall panels together was to use bolts and washers inside of pre-drilled holes in the pine. But because I had plenty of wood clamps I decided to use them. As a backup to the wood clamps I simply used 3 1/2″ wood screws to make sure the boards didn’t shift when picking it up and putting it in place.
The Decor
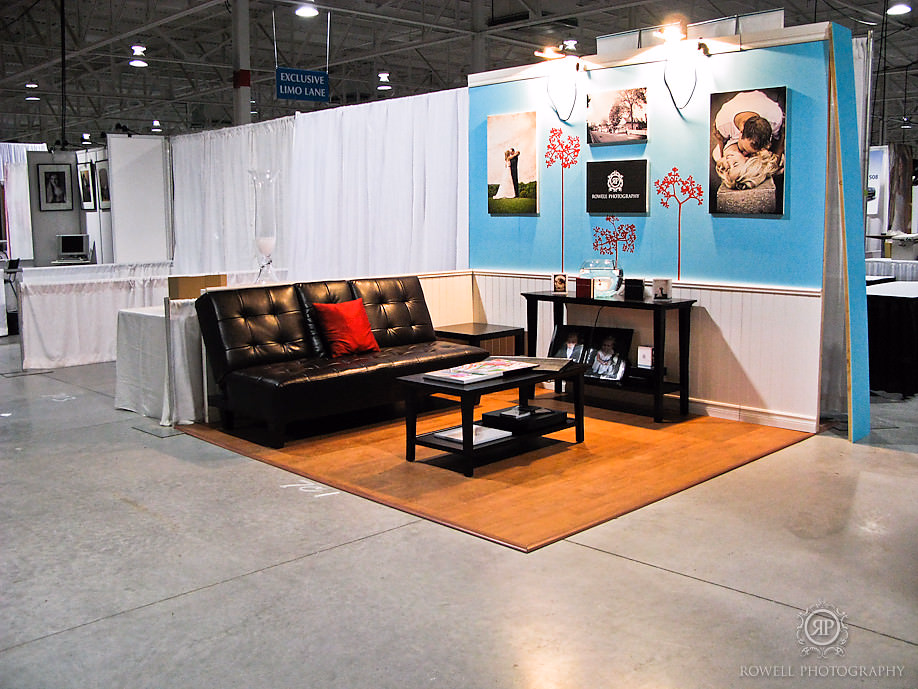
To show off one of the features of our albums we decided to put one in a large punch bowl with our fish in it too. Our albums are waterproof and we couldn’t think of a better way to display them, then to have it in water. It was a hit, and we received many strange looks and lots of comments on it.
The sofa we chose to use was one with a pull down middle that can be used as a table, and it served our albums well when couples would come to sit and look at our work. It also was helpful to have a place to sit for all those displaced grooms-to-be with bags cutting off their circulation. It was also our hook because if he seemed interested then so would the bride-to-be when she finally found out where he was.
We decided last minute to buy some vinyl stickers to spice up the walls and to give some much needed colour to our display. I actually just thought they would look good and decided to buy them whether we would use them or not.
All in all the booth was a piece of cake, thinking back on it now we could have done a few things differently, but the method to which we built our very first trade show booth worked for us. It took us just over 3 hours to assemble once we were at the trade show. It would have taken us a lot less time had done a practice run at home and had the chance to iron out some of the wrinkles, such as: cutting the floor trim and crown molding ahead of time, and having the velcro on the crown molding we used at the top of the walls before we left. Even just pre-drilling the holes for the chair rail would have saved so much time. We also didn’t assemble any of the furniture until we got there so that was more time that could have been saved. You can also see in the video that I spent too much time deciding on how I was going to mount the photos on the back wall too. Setting up this type of booth is a 2 person job! So make sure you have someone there to help you build, especially hold up the walls while you put the supports on.
I would really love to thank my father so much for helping me every step of they way and for letting me use his home to lay everything out. Without your help and guidance I don’t think this booth would have been as much of a hit as it was.
Thanks Dad!
-Ryan